Crocheting is an activity that can be enjoyed by anyone because this creativity is an outlet that allows for full expression. That's the main reason, people consider it to be therapeutic and meditative.
Not just a great functioning hobby but crocheting beautiful clothing can be a profession too. All you need to do is get used to holding your hook and yarn, learn to make a slip knot, and crochet a chain. You are good to go!
So, if you are looking forward to learning a new skill or starting a new hobby, this blog is exactly where you need to be.
Here, we will discuss every little detail to prepare you to create handmade wearables such as scarves, hats, blankets, and even sweaters. Let's get started!
What is Crochet?
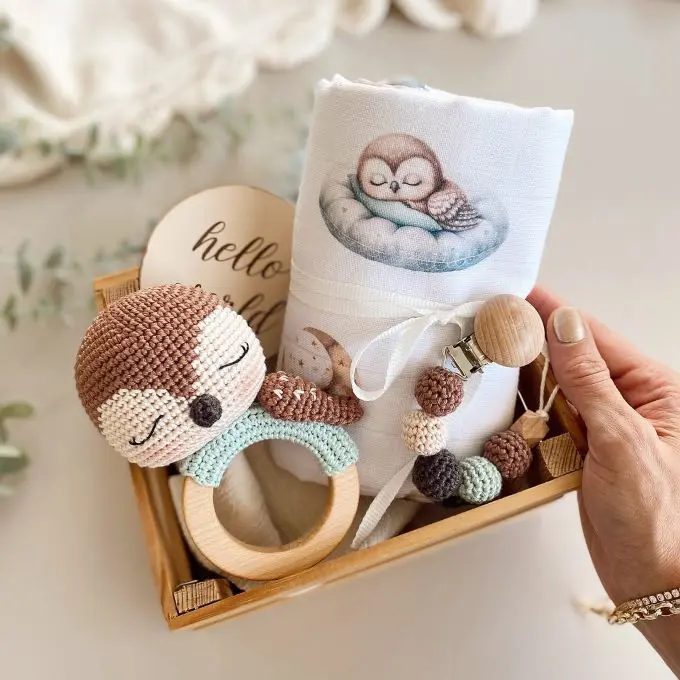
Crochet is a method of creating looped fabric from yarn which is tricky to learn but not difficult at all. It is amongst the popular yarn crafts that has been around for centuries.
Start by learning the basics of crochet, focusing on simple techniques and a few beginner stitches. Once you get the hang of those, you can gradually explore more intermediate and advanced skills.
With the fundamentals down, you'll be ready to create all kinds of cozy projects, from adorable baby booties to classic granny squares.
Best Crochet Supplies for Beginners
To start crocheting, you'll need a few essential supplies including
Yarn
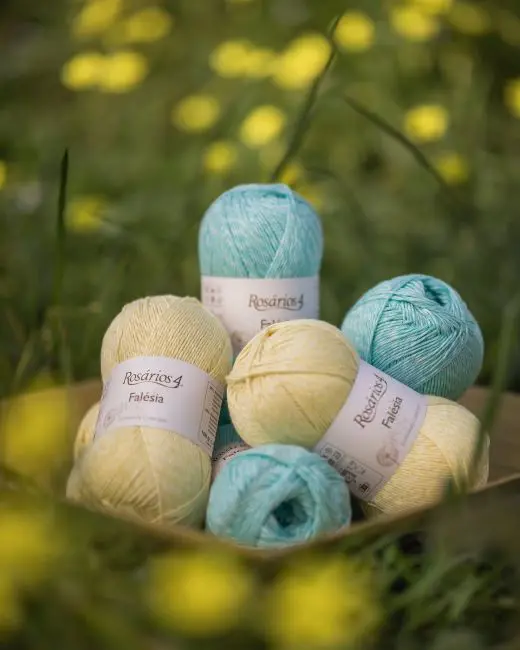
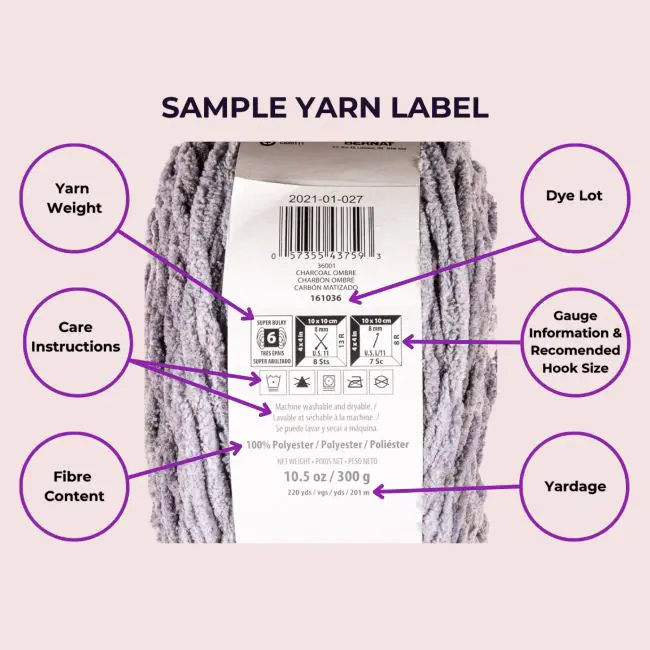
When you are a newbie shopping for yarn, always pay attention to the label, as it's best to choose a thicker yarn and use the hook size recommended on the yarn label.
The label includes a number indicating the yarn’s weight, and a newbie should look for size 4 (medium-weight) or larger. For size four yarn, the label usually suggests a 5.5mm hook, also called size I-9.
Yarns also comes in various weights, from super-fine baby yarn to bulky wool. For easy practice, stick with medium-weight yarn like acrylic, wool, or cotton.
Pick smooth-textured yarn because it’s easier to see your stitches. Lastly, pick lighter colors, which help you spot where to insert your hook.
Hook
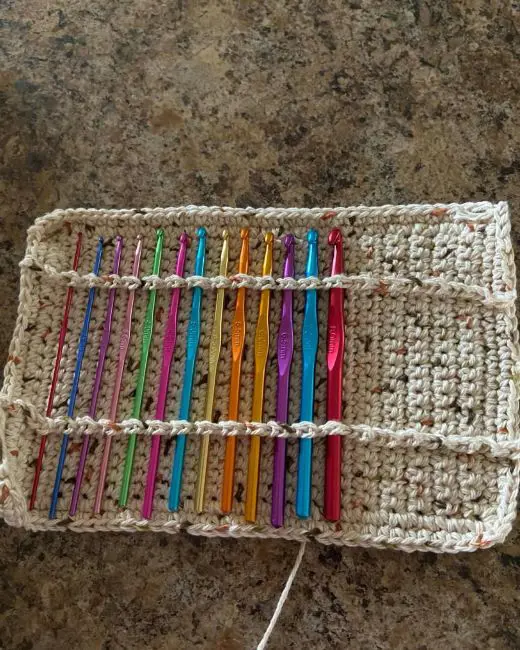
Crochet hooks come in many materials and sizes. The key is matching the hook size to your yarn weight. The thicker yarn needs larger hooks; thinner yarn pairs with smaller ones.
If you're just starting out, try an ergonomic hook in a medium size, like G6 (4.25mm) or H8 (5mm).
Still unsure about hook size? In that case, check the yarn label, which should look something like this. It will guide you to the right one!
Other Handy Tools to Consider:
- A yarn needle or blunt-tipped tapestry needle for weaving in ends.
- Stitch markers to keep track of your work.
- Small, sharp scissors for clean cuts.
Crochet for Beginners Step by Step
Once you have made up your mind, gather your supplies and set up a cozy workspace with plenty of light to see your stitches clearly.
But, before you pick up your hook, take a moment to read through the steps. Crocheting takes a bit of practice, so don’t worry if it feels tricky at first—just keep at it! You've got this!
Step 1: Learn How to Hold the Crochet Hook
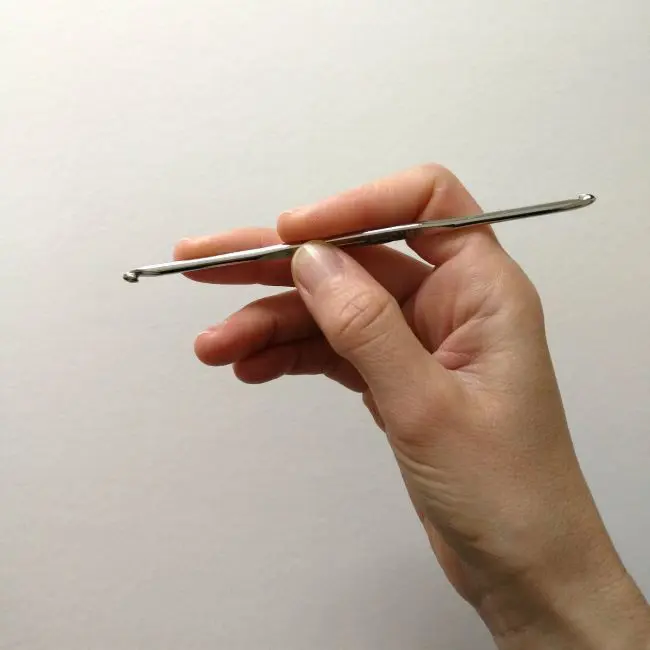
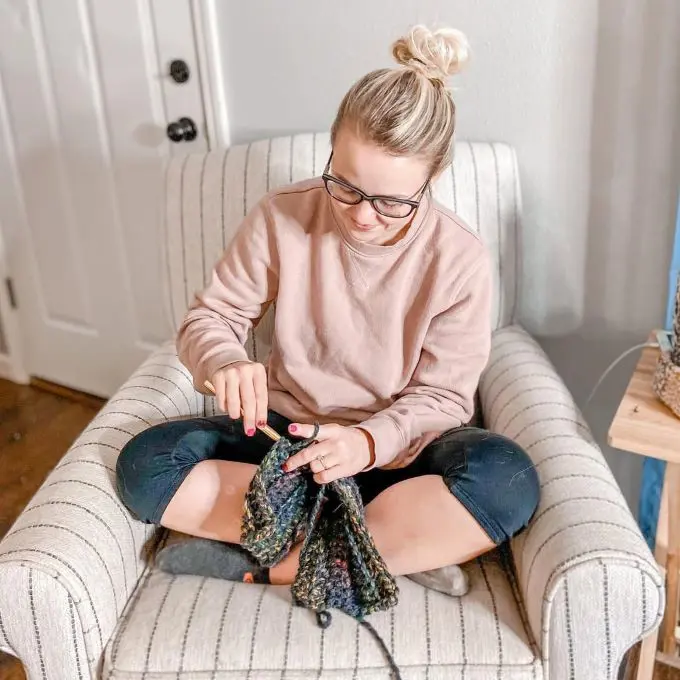
The first thing you need to do is to learn how to hold the crochet hook. You should hold in a way that feels comfortable for you. Often, people hold the hook in their dominant hand and the yarn on the other one.
As people are mostly right handed, we will be writing the directions from the perspective of a right-handed person. However, if you are a leftie, you can reverse the directions to learn how to do left-handed crochet.
Pencil Grip: Like shown in the picture above, you can hold the hook between your index finger and thumb like a pencil and simultaneously use the third finger underneath for balance and control.
Knife Grip: Hold the hook between your thumb and index finger, palm facing downwards. Then, wrap rest of your fingers around the shaft of the hook for greater control.
Step 2: How to Tie a Slip Knot
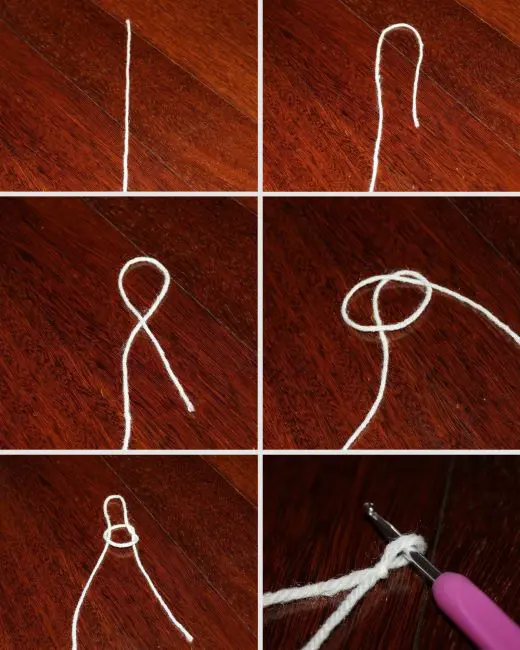
To begin with a slip knot, pull a length of yarn from the ball, leaving about 6 inches as a tail for weaving in later. Form a loop by crossing the ball end of the yarn over the tail in a clockwise direction.
This creates a circle with the ball end resting on top of the tail. Next, insert your crochet hook into the center of the loop, moving from front to back. Catch the ball-end yarn with the hook and pull it through the loop’s center.
Gently tighten the loop around the hook by pulling both the tail and ball ends of the yarn. That’s it! Your slip knot is ready, and you’re all set to start crocheting.
Step 3: How to Yarn Over
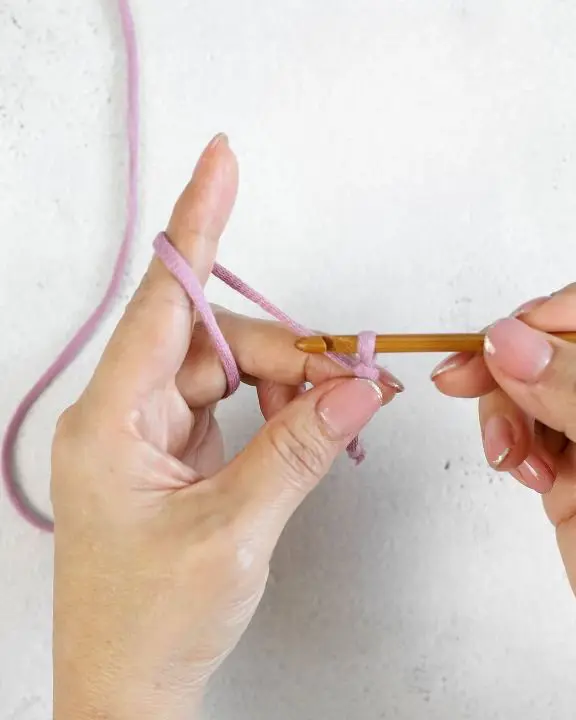
The yarn over (YO) is an essential crochet technique you’ll rely on for nearly every stitch. From creating a starting chain to forming single crochet stitches, this simple motion is the backbone of your work.
To yarn over, loop the working yarn around the hook in a clockwise direction, moving from back to front. You can achieve this by using your left-hand index finger to guide the yarn over the hook or by pivoting the hook under the yarn with your right hand.
Both methods work equally well, so choose what feels most natural. Once you’ve practiced the motion, you’ll seamlessly incorporate it into all basic crochet stitches.
Step 4: Make a Starting Chain
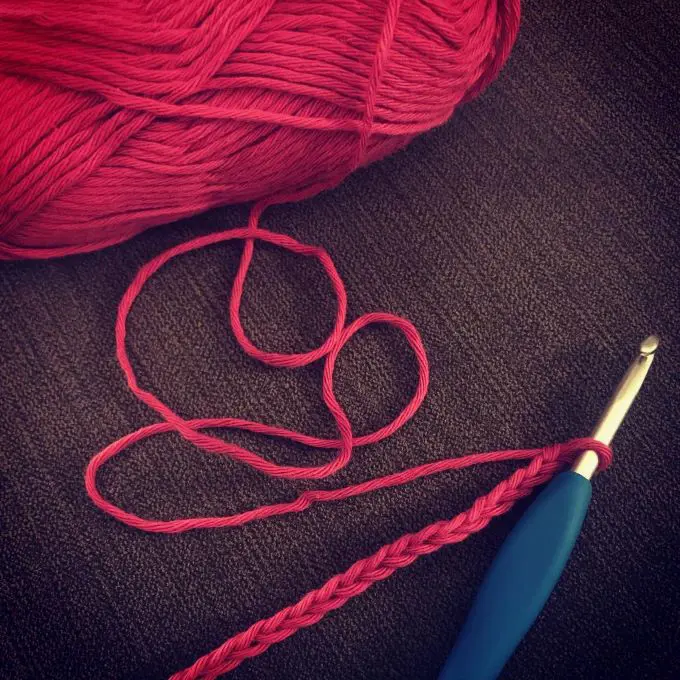
The next step is creating a strong foundation for your crochet project. To begin, hold the hook in your right hand and the yarn in your left, and
• Insert the hook into the slip knot if it’s not already there, and secure the slip knot between your thumb and middle finger.
• Wrap the working yarn over the hook from back to front (a yarn over), then rotate the hook slightly to catch the yarn in its bowl.
• Pull the hook through the loop, completing one chain stitch. To continue, yarn over and pull up another loop, repeating until you’ve made the required number of stitches.
• For this swatch, make 11 chain stitches. Hold the chain two or three stitches away from the hook for better control, and remember, consistent tension comes with practice.
• When counting your stitches, don’t include the loop on the hook or the slip knot.
Step 5: Working Into the Chain
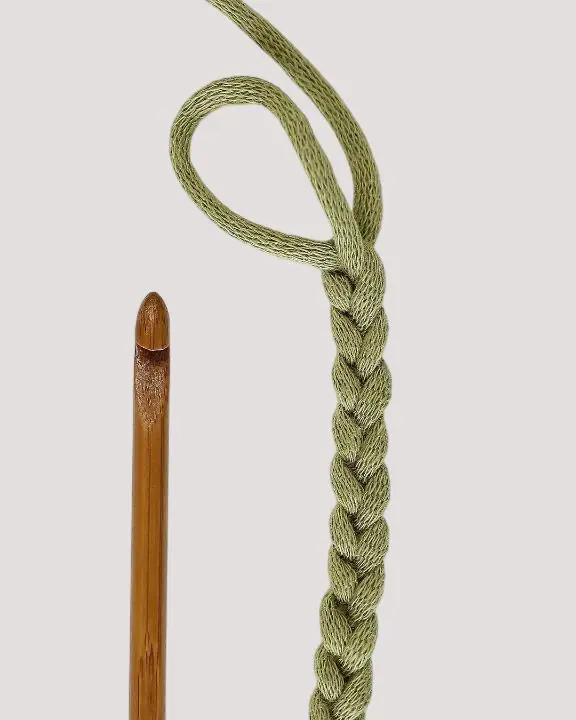
Let’s take a moment to examine the chain stitches you’ve created. The front side of the chain shows a series of interlocking Vs, while the reverse has bumps, often called back bars.
You’ll use this foundation chain to start your first row of crochet stitches. Depending on the stitch type, the first stitch will go into the second, third, or fourth chain from the hook, as your pattern specifies.
To begin the first row, insert your hook into the chain stitch from front to back, letting the tip pass through the center of the V. Some patterns might ask you to flip the chain and work into the back bar, which can create a cleaner edge.
The first row can feel challenging, especially for beginners. It takes practice to identify the right spot for your hook, and without much fabric to hold, it might feel a bit tricky—but don’t worry, it gets easier!
Step 6: Learn How to Single Crochet
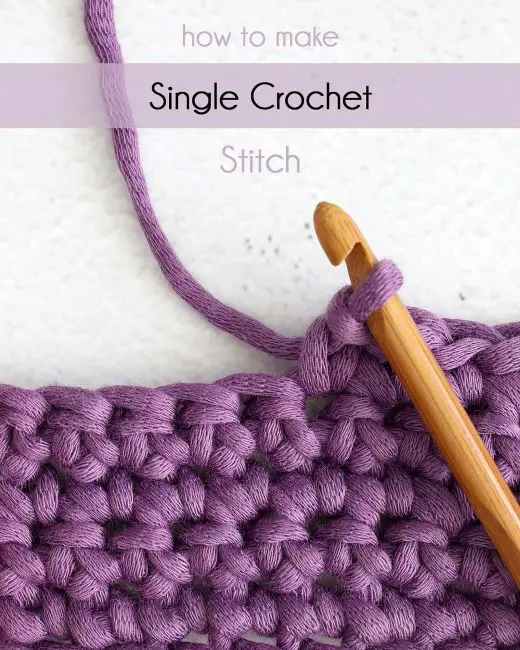
The single crochet stitch is one of the easiest and most commonly used stitches in crochet, making it perfect for beginners. In patterns, it’s often abbreviated as SC. Let’s create the first row of our swatch with single crochet stitches.
Start with a chain of 11 stitches (you can use the chain we made earlier). Insert your hook into the second chain from the hook, then yarn over by bringing the yarn over the hook from back to front.
Next, pull the yarn through the chain, creating two loops on the hook. Yarn over again and pull the yarn through both loops. This completes your first single crochet stitch.
Continue these steps for the remaining nine chain stitches, giving you a total of 10 single crochet stitches. Take your time to avoid twisting the chain as you work.
Step 7: Make a Turning Chain
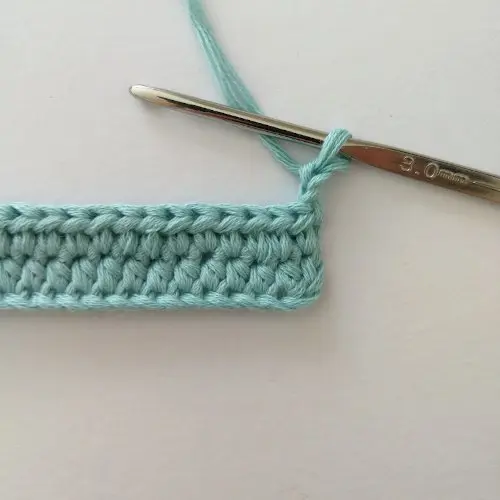
At the end of a row, you’ll need to turn your work and create a turning chain before starting the next row. The turning chain adjusts the yarn to the correct height for the first stitch of the new row.
To turn your work, rotate it 180 degrees clockwise, so the opposite side faces you. Keep your hook in the stitch as you turn to avoid losing your place.
After turning, make the turning chain—one or more chain stitches—depending on the height of the stitch for the next row. For single crochet, make one chain; for half-double crochet, make two; for double crochet, three; and for triple crochet, four.
Wondering if you should turn your work or chain first? It doesn’t really matter. Choose whichever feels natural and stay consistent throughout your project.
Additionally, always turn your work in the same direction, either clockwise or counterclockwise, to maintain a uniform look.
Step 8: How to Work Row 2
Now, let's move to the second row. This row will be worked into the previous row of single crochet stitches instead of the starting chain.
Begin by turning your work and chaining 1 (this doesn’t count as a stitch). Insert your hook under the top two loops of the last stitch from the previous row. Yarn over, pull through, leaving two loops on the hook.
Yarn over again and pull through both loops, leaving one loop on the hook. This completes your first single crochet stitch.
Keep going across the row, making one single crochet in each of the remaining stitches. Be sure to count your stitches as you go to ensure the correct number.
Once the row is complete, turn your work to begin the next row. Repeat the process for additional rows, then cut the yarn and fasten it off when you're done.
Step 9: How to Fasten Off
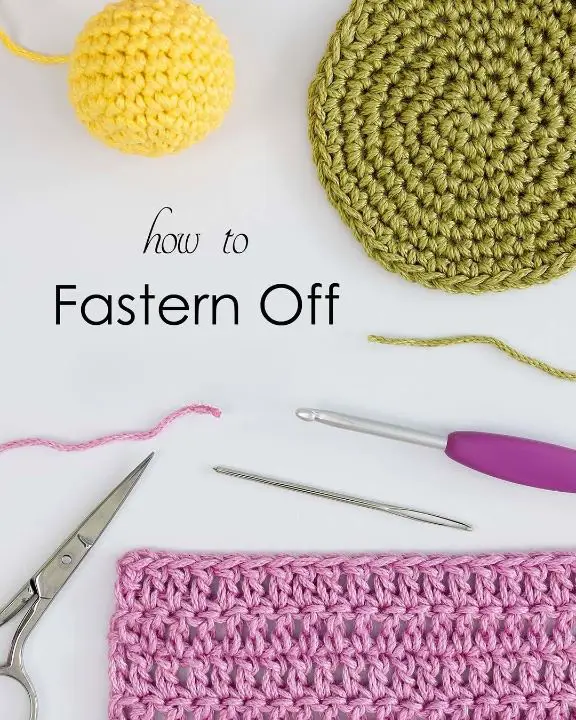
Upon finishing the last row of your crochet swatch, it's time to secure the yarn to prevent the stitches from coming undone.
To fasten off, cut the yarn, leaving about a 6-inch tail. Then, use your hook to draw the yarn tail through the loop on your hook. Remove the hook and gently pull on the tail to tighten the knot.
Next, you can weave in the yarn tails for extra security. Thread a blunt-tipped yarn needle with the tail and carefully weave it back and forth through the fabric of your crochet swatch.
And that's it! You've completed your first crochet swatch.
Magic Loop Crochet
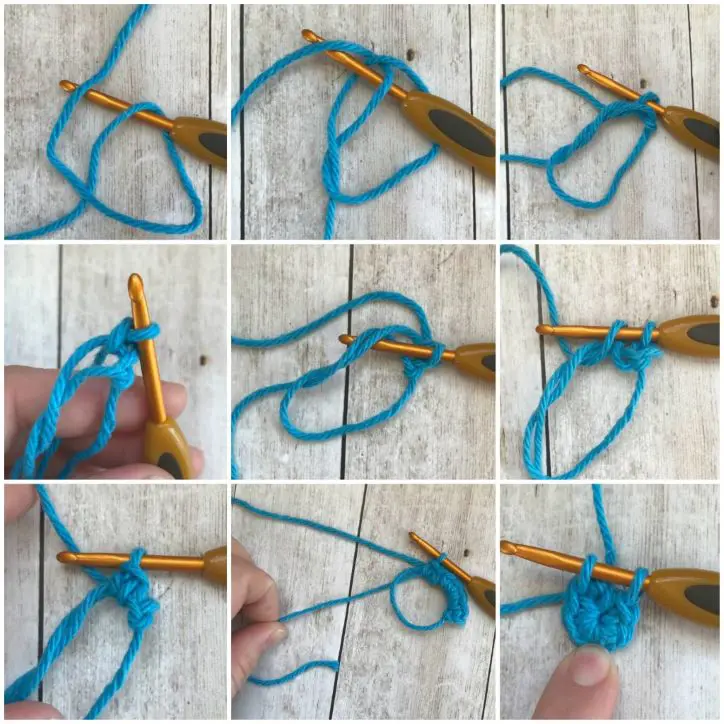
If you are wondering how to make a magic loop crochet, begin similarly to how you would with a slip knot.
Lay the yarn tail (the end not attached to the ball) over your hand, then wrap the yarn attached to the ball around the back of your hand. Cross it over the tail to form an "X" shape, creating a loop.
Next, slide the ball-end yarn under the loop and pull it upward. Instead of tightening it as you would with a slip knot, pull just enough to form a loose loop.
Insert your hook into this loop while keeping the larger loop open. This forms your magic ring, ready for crocheting.
Crochet Granny Square
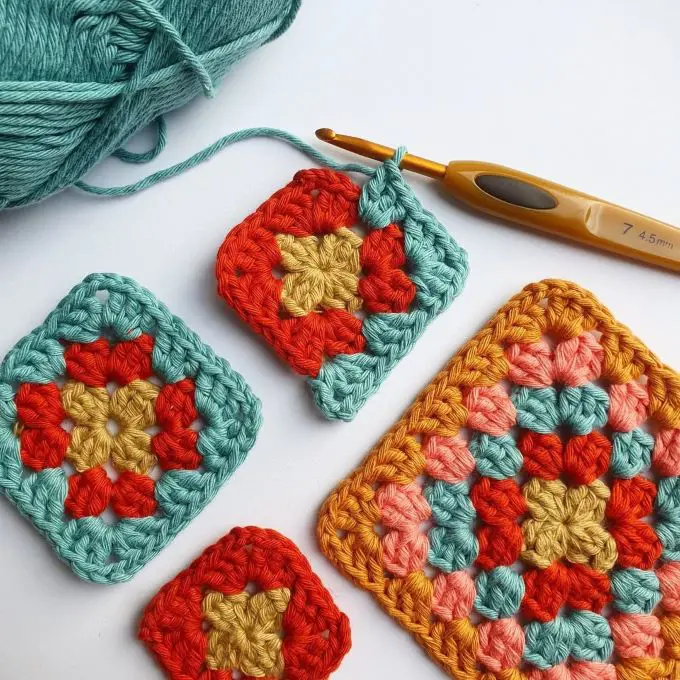
To crochet granny square for beginners, strart by creating a foundation ring with a slip knot and chain 4. Slip stitch into the first chain to form a circle. Then, work 3 double crochets (DC) into the center of the ring, followed by a chain 2.
Repeat this pattern (3 DC, chain 2) three more times to form four corner spaces, ending with a slip stitch into the top of the first double crochet. For the second round, chain 3 (this counts as your first double crochet), then work 2 DC into the first corner space.
Chain 2, and repeat by working 3 DC, chain 2 in each corner space around the square. After completing the round, join with a slip stitch into the top of the first chain-3.
Keep adding rounds, working 3 DC, chain 2 into each corner space, and adding 2 DC between each corner space, until your granny square is the desired size.
To finish, cut the yarn, fasten it off, and weave in the ends. Now, you’ve made your first granny square!
Crochet Beanie for Beginners
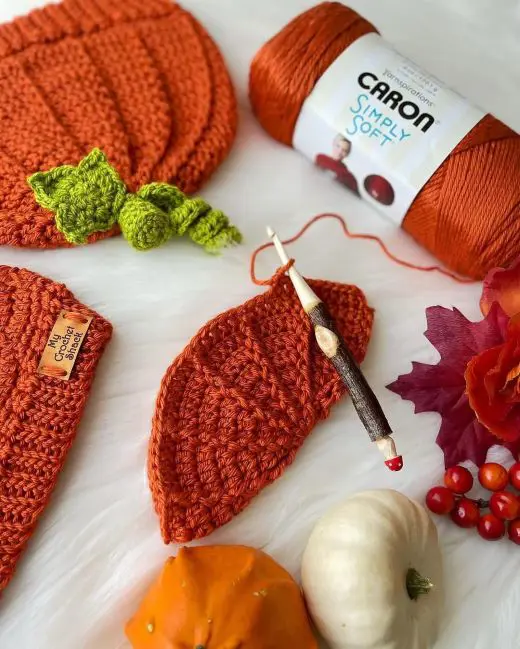
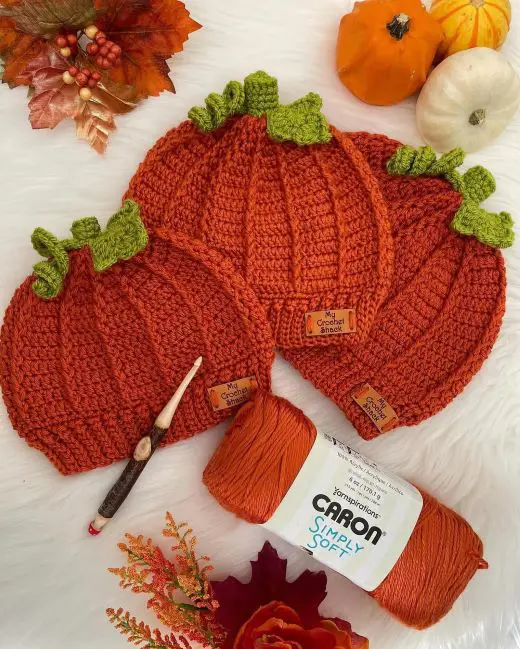
Making a crochet beanie is a fun and beginner-friendly project. It’s a great way to practice basic stitches like single crochet and double crochet while creating something useful. Here’s a simple guide to help you get started.
Materials Needed:
- Worsted weight yarn
- Crochet hook (size H/8 or 5mm recommended)
- Scissors
- Yarn needle
Instructions:
Start by creating a magic circle as it will be used as the foundation of your beanie. Inside the magic circle, make 10 double crochet stitches. Pull the tail of the circle to tighten it. But make sure to understand that this chain doesn't count as a stitch.
In the same stitch, make 2 double crochet stitches. Continue making 2 double crochets in each stitch around, for a total of 20 stitches. Join with a slip stitch to the top of the first double crochet. Again, this doesn’t count as a stitch.
Make 1 double crochet in the next stitch, then 2 double crochet in the next stitch. Repeat this pattern (1 double crochet in one stitch, 2 double crochet in the next) all the way around. You should have 30 stitches at the end of this round.
Repeat the same process of increasing by making 1 double crochet in the first stitch and 2 double crochets in the next. Keep increasing until your beanie fits the width of your head.
Typically, you’ll stop when you reach around 60 stitches, but you can adjust based on the fit.
Once you've reached the desired diameter, stop increasing. Continue working in double crochet around until the piece reaches the desired height of the beanie, usually about 7 to 8 inches.
Once the height is right, fasten off the yarn. Leave a long tail, then use a yarn needle to weave in the ends. You can also add a pom-pom or other embellishments for a fun touch!
Tips:
• Make sure to count your stitches after each round to keep track of your increases.
• If your beanie feels too tight or too loose, adjust the number of increase rounds or the size of your hook.
• Experiment with different yarns and colors to customize your beanie!
How to Increase Stitches in Crochet?
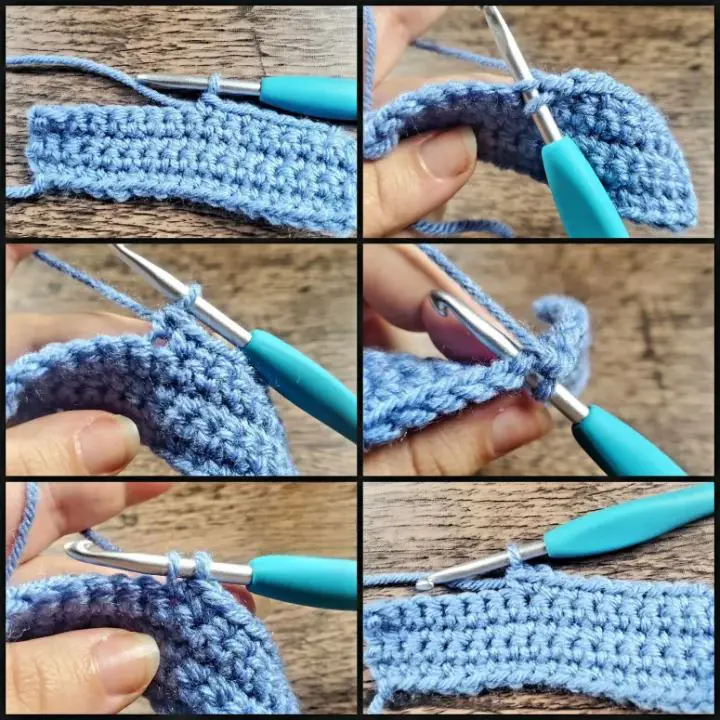
To increase, simply make two or more stitches into the same stitch. This adds stitches to your work, allowing the piece to grow. For example, if you’re working with single crochet, you would make two single crochets in the same stitch.
This same technique applies to other stitches, such as double crochet or half-double crochet, by working two of the same stitch into one space.
How to Decrease Stitches in Crochet?
Decreasing, on the other hand, is used when you want to reduce the stitch count. The technique varies depending on the stitch.
For a single crochet decrease, you would work two single crochets together by inserting the hook into both stitches, yarn over, and pulling through all loops.
A half-double crochet decrease and double crochet decrease follow similar processes but with slightly different steps, ensuring the stitches are combined to reduce the overall stitch count.
These techniques are perfect for shaping, like when creating armholes, shaping garments, or forming curves in a piece.
Crochet with your Hands
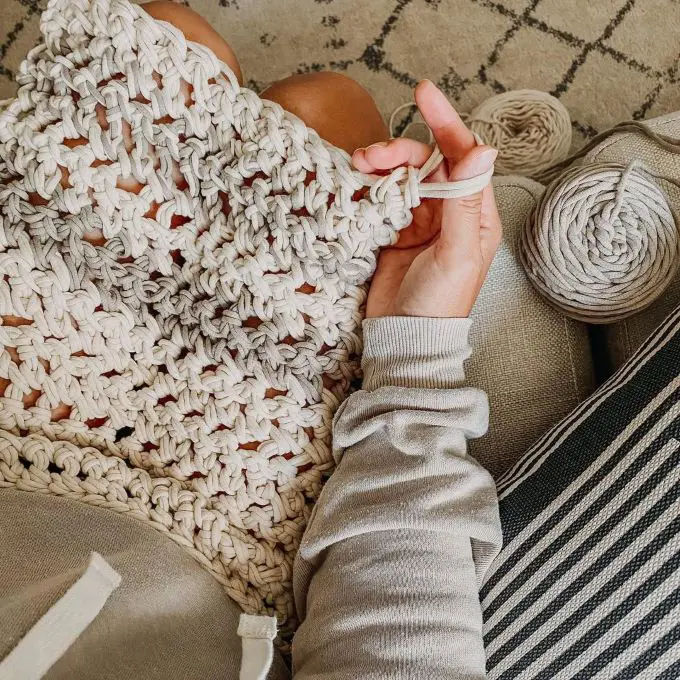
Crocheting with your hands and fingers is a fun and easy way to create cozy, chunky projects without needing a crochet hook. To begin, start with a slip knot, then create a foundation chain by pulling the yarn through the loop with your fingers.
For basic stitches, like single crochet or half double crochet, simply use your fingers to insert into the stitch, grab the yarn, and pull it through, then finish the stitch as usual.
The larger the yarn, the easier it is to work with, making this technique perfect for beginners looking to craft fast, oversized items.
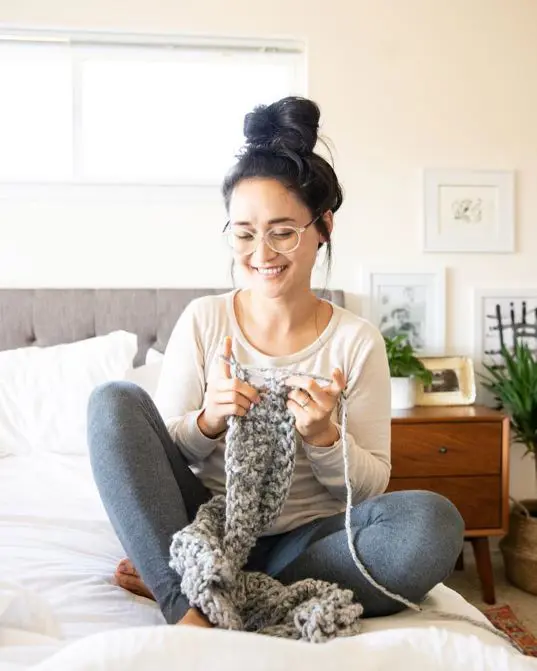
With this method, you can work in rows or in the round depending on your project. The hand-crochet technique works especially well for blankets, scarves, or even rugs, creating a thick texture that’s both stylish and functional.
Once you've reached the desired length or size, cut the yarn, leaving a small tail to fasten off the project. It’s a simple yet creative way to make chunky, cozy pieces while keeping the process tactile and fun!
For those wanting to learn how to crochet with your hands, this is how you do it.
Crochet Blanket
You can make a cozy crochet blanket using your fingers or a large crochet hook for a quicker, more relaxed project. Once you’ve created your blanket to the desired size, it’s time to finish it off neatly.
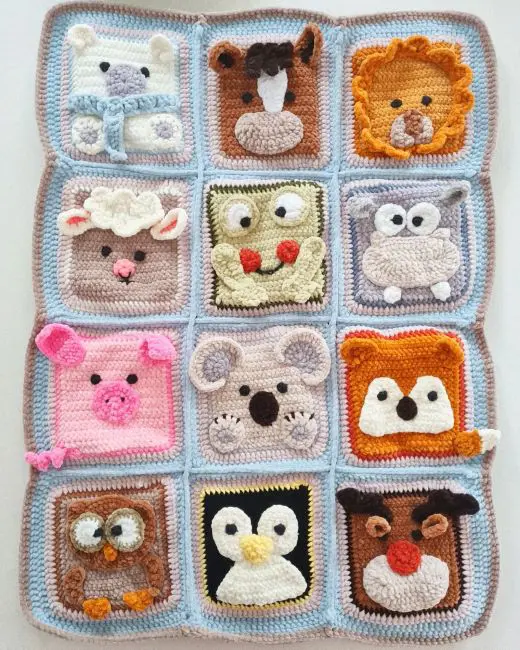
How to Finish a Crochet Blanket?
Start by cutting the yarn, leaving a small tail. Use your crochet hook to pull the yarn tail through the loop on your hook to fasten it off, securing the stitches.
To tidy up any loose yarn ends, thread a yarn needle with the yarn tail and weave it through the stitches, pulling gently to secure it in place. Once all the ends are woven in, trim any excess yarn for a clean finish.
For an extra touch, you can add a border around the edges of your blanket. You can crochet a simple single crochet border or a more detailed pattern like a shell stitch for added texture.
Work evenly around the entire blanket, fastening off once you reach the starting point. Finally, weave in any remaining yarn ends, and your blanket is ready to be enjoyed!
Easy Crochet Patterns for Beginners
Knitting vs Crochet
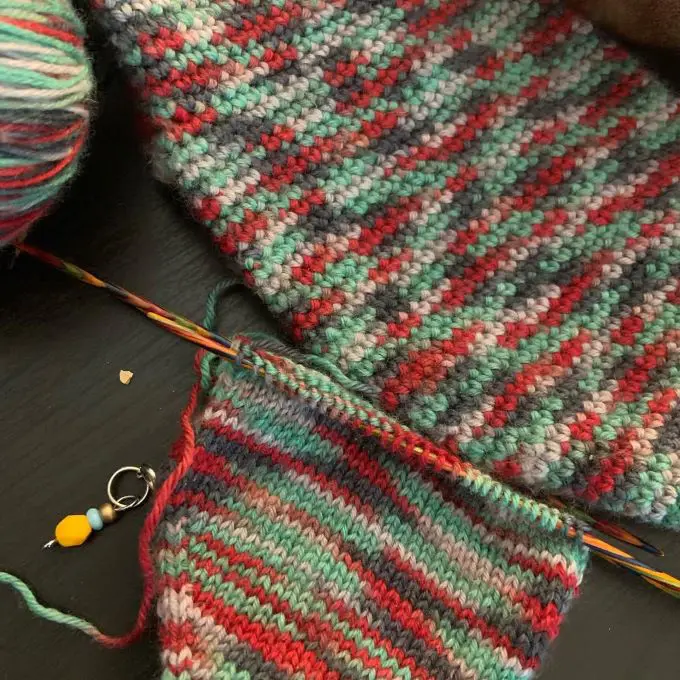
Knitting and crochet are both popular yarn crafts, but they differ in techniques, tools, and the final results.
Knitting
It involves using two needles to create loops of yarn, which are worked in a series of interconnected rows or rounds. This method produces a fabric that is often stretchier and more flexible, making it ideal for garments like sweaters and socks.
Moreover, knitted fabric tends to have a smooth, consistent texture, and the process usually requires more time due to the intricate stitch patterns.
Crochet
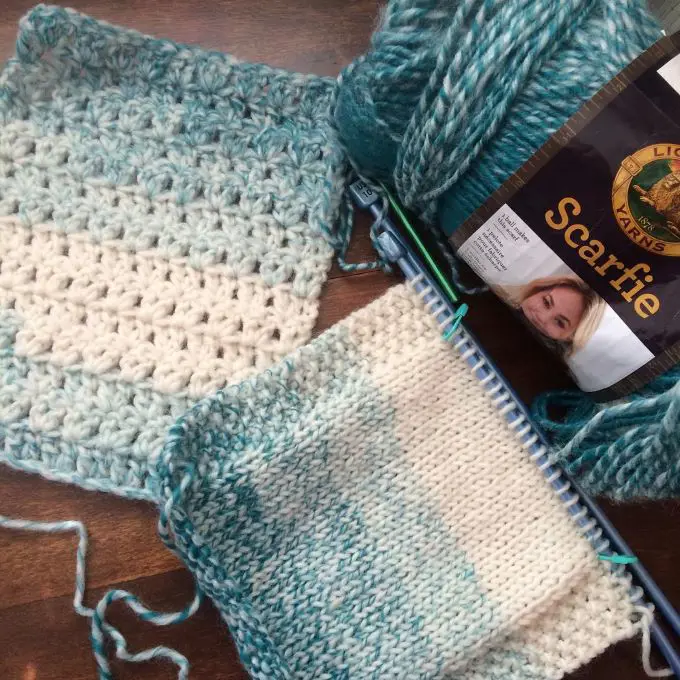
On the other hand, crochet uses a single hook to pull loops of yarn through other loops to form fabric. It's typically faster than knitting because each stitch is completed before moving on to the next one.
Crochet fabric can have a thicker, denser texture, making it great for projects like blankets, shawls, and accessories. It also allows for more versatility in stitch patterns and designs, including intricate lace and textured effects.
While both techniques are fun and creative, choosing between knitting and crochet depends on the desired outcome and personal preference for tools and techniques.
Summary
Crocheting is an easy and accessible craft that allows you to create a variety of projects with just a hook and yarn. With little effort, you can quickly start making anything from blankets to accessories, unlocking endless creative possibilities.


