Do you have silky hair and dream of flaunting luscious curls, but hesitate due to the damage caused by chemical treatments or heat styling tools? If so, heatless curling techniques may be the perfect solution for you.
These methods offer a gentler alternative to heat-styling tools, preventing hair breakage while promoting moisture retention and shine.
Whether you’re after soft waves or defined curls, these heatless techniques are safe, simple, and work for all hair types.
Say goodbye to hair damage and hello to chic curls! In this article, we’ll explore a variety of heatless curling methods that let you style your hair effortlessly while preserving its health. Keep reading to find the best techniques for you!
1. Overnight Braids
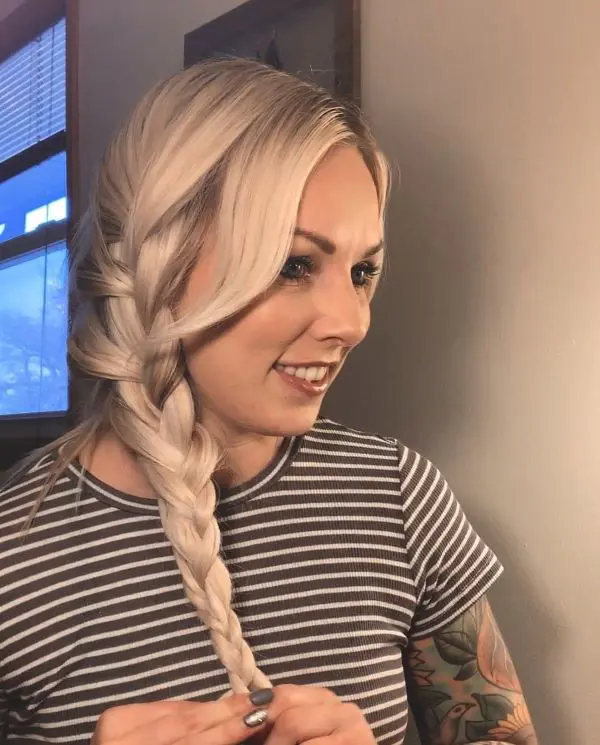
Overnight braiding is a simple and effective way to achieve natural curls. For this: start with slightly damp hair.
Then, divide it into sections based on your desired curl size, either a larger section or a smaller section. It is because, you will get looser waves with a larger section and tighter curls with smaller sections.
Following that, secure each braid with a hair tie at the end and take a nap. Next morning, undo the braid curl and gently separate the hair with your fingers.
There, you’ll notice a soft, wavy look that works for casual or professional settings.
Consequently, this technique is comfortable for overnight use and works on most hair types.
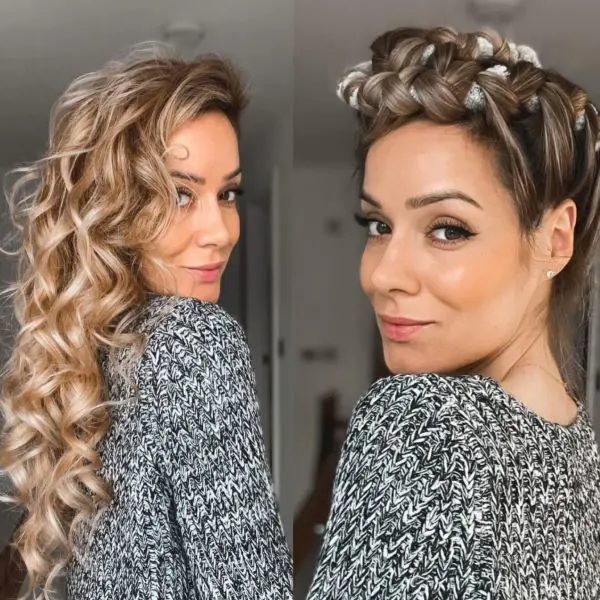
However, there is no particular braid style that you should follow, you can do any of the styles, like french braid, crown braid or more.
2. Sock Curls
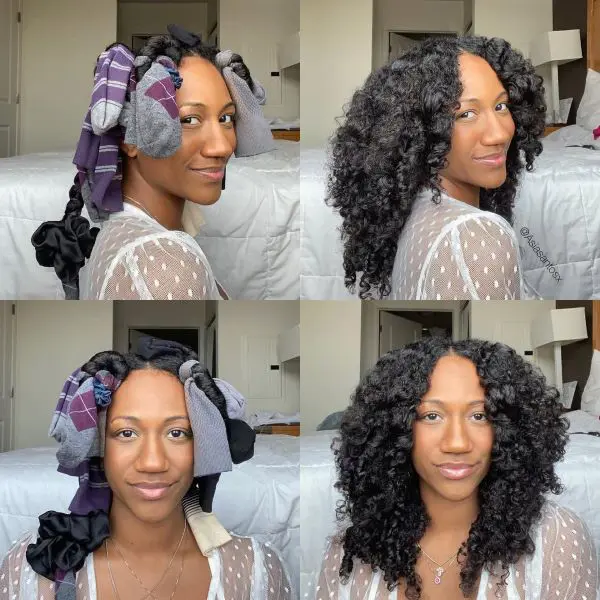
Heatless curls with socks are created just by using socks as a curling tool to create soft, voluminous waves. This process begins with dividing the damp hair into medium-sized sections.
Simultaneously, place the sock at the roots of a section, wrap the hair around it, and slowly roll downward until you reach the ends.
Then, tie the sock’s ends together to secure the curls and continue this pattern for each section.
In order to set the curls, you may have to wait for 6-8 hours, so it’s best for overnight use.
Following morning, carefully unroll the socks, and use your fingers to separate the curls. You may see bouncy heatless curls that look natural and full of life.
However, compared to braid curls, this curling technique requires more time and even may take practice to get the sock wrapped.
3. Twist And Pin

If you are looking for well-defined, spiral curls then twist and pin curls are an excellent option. Like every other method, this technique also begins with damp hair and its sections.
So, take each section, twist it tightly from the root to the tip, and coil it into a small bun at the scalp. Then, secure each bun with bobby pins or clips.
Wondering how long to leave heatless curls in this stage? These methods require patience and work best if left in for several hours or overnight.
Once the hair is fully dry, gently release the twists and shake them out.
While creating twists and securing them can be a bit tricky, it will be a great option for those with medium to long hair.
4. T-shirt Curls (Plopping)

T-shirt plopping is a quick, beginner-friendly method with minimal effort. You may begin by applying a curl-enhancing product to your damp hair.
After that, lay a cotton T-shirt on the surface and flip your hair onto the center of the T-shirt. Then wrap the fabric around the head, securing it at the back or with a knot.
Leave the hair wrapped for 1-3 hours. Unwrap your t-shirt once your hair is dry, use your fingers to fluff out the curls.
Doing this will not only reduce frizz but also enhance your natural curl with a beautiful hairstyle, leaving your hair more defined and manageable.
5. Headband Wrap
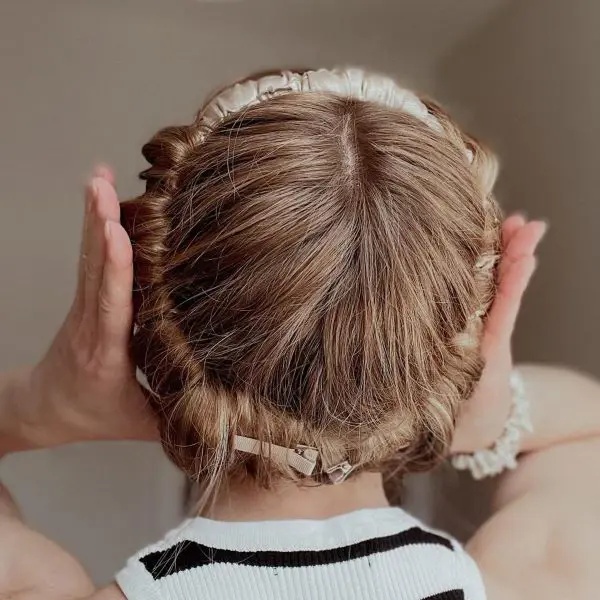
Although the curling headband method requires some practice, it is easy to learn and a great choice for those with medium to long hair.
Begin the process by placing a stretchy headband around your head, over moderately damp hair. Take small sections of your hair and wrap them over and under the headband.
Tuck the ends securely, and continue wrapping until all hair is incorporated. Leave the headband in place for at least 6 hours, then remove it.
At The end, it will create elegant, uniform curls, leaving you with a polished and refined appearance.
6. Flexi Rods
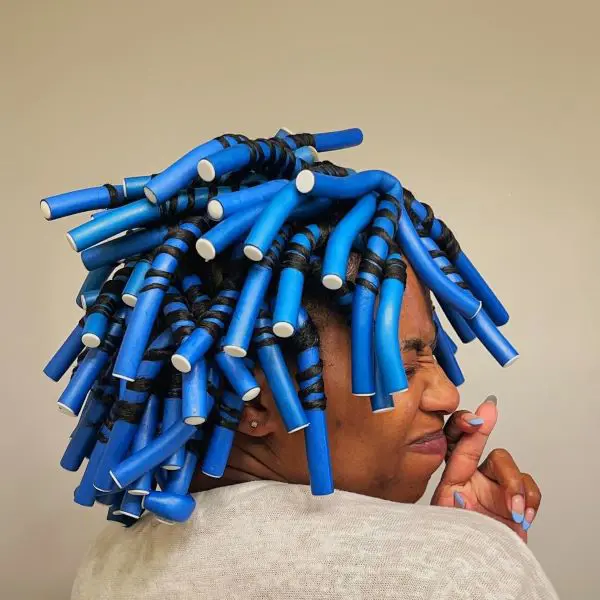
Ever wondered how to do heatless curls with rod? The process begins by dampening your hair and dividing it into sections, just like with other methods.
Gradually wrap each section around the rod, starting at the ends and rolling upward toward the scalp. Then, bend the rod to secure the hair in place.
In order to get the best results, leave the rods in overnight. Then, carefully remove the rods and tailor a trending curly hairstyle. The best part of using rods is that you can choose different rod sizes to create a variety of curl patterns.
However, mastering the wrapping technique may be challenging at first due to its flexibility and placement ideas.
7. Bantu Knots
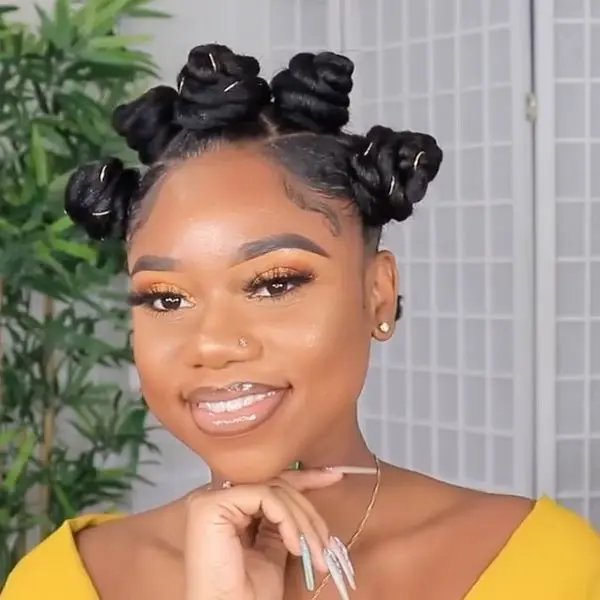
This method begins by parting your damp hair into small sections. After that, twist each section tightly until it coils into itself, forming a knot. Then, secure it with a hair tie or bobby pin.
Therefore, leave your hair overnight. Next morning, unravel the knots and separate the curls.
Since, bantu knots are a traditional method for achieving tight, defined curls. It holds a fun fact that you can wear the knots as a chic hairstyle, giving you a double benefit: curls and a stylish look.
8. Foam Rollers
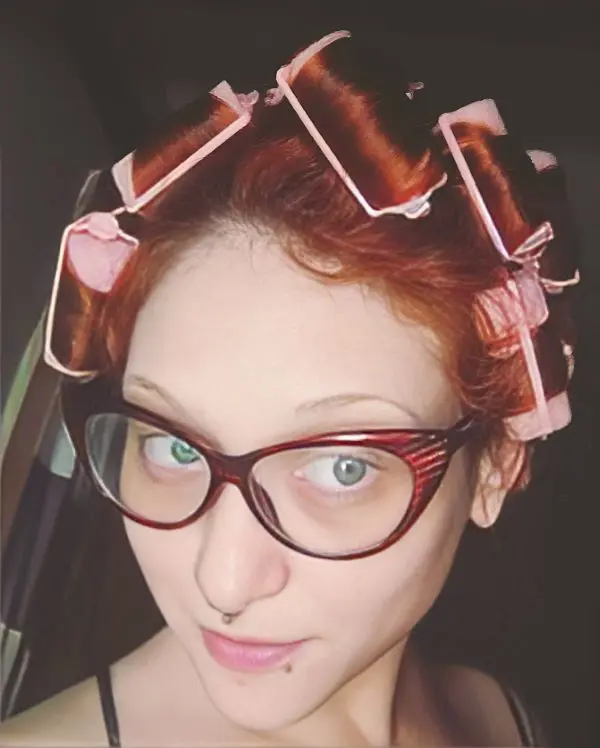
This is a classic and widely used heatless tool when it comes to curls. Start with damp hair and section it into parts.
Next, roll each section onto a foam roller, starting from the ends and rolling upward toward the roots, securing the roller using an attached clip or pin.
After that, allow the rollers to set for about 8 hours and slowly remove the rollers, and separate the curls with your fingers or a wide-tooth comb.
Though rollers create smooth, uniform curls and are suitable for all hair lengths, sometimes it is a hassle to handle. Due to hair getting tangled in the rollers, which can be messy.
However, if you ever try these to keep overnight, it doesn’t trouble you with your sleep and gives you comfort.
9. Paper Towel Curls

Tight on a budget? No problem! You can style your hair on a minimal budget by using paper towels. First, tear paper towels into strips (about 6-8 inches long), and fold them lengthwise for thickness.
Next, start with damp hair, and wrap a section around a paper towel strip, rolling upward to the scalp. Tie the ends of the towel strip to secure the curl. Continue this process for your whole hair.
Subsequently, let your hair air-dry or leave it overnight. Once your hair is completely dry, gently remove the paper towels from each curl.
However, you have to be careful while removing it because, if you pull the towel hard, it could disrupt the curls and cause frizz. Lastly, finger-comb the curls to separate them and add volume.
10. Leggings Curls
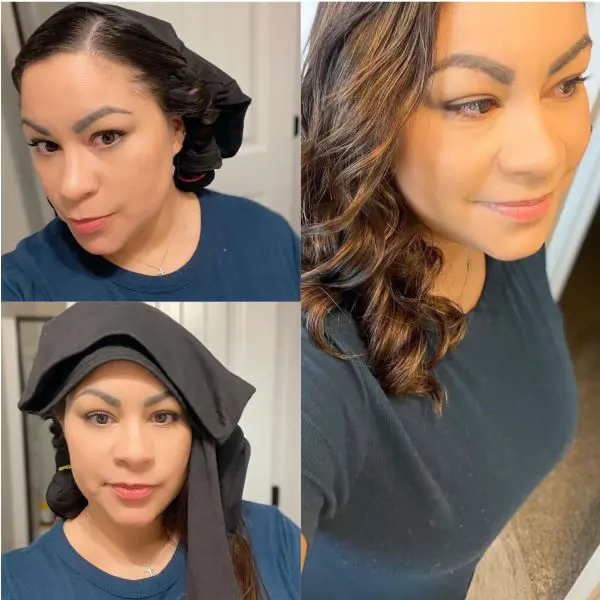
Wondering how to do heatless curls with leggings? You will only need a pair of old or stretchy leggings. Then, begin the process with your damp hair.
If you prefer, cut the leggings into 1-2 inch wide strips. If not, use them as one long flexible roller.
Next, section your hair, place the ends of a section at one of the leggings strips and start rolling the hair and tie the knot to secure them with a hair tie.
For comfort, wear a headscarf or towel to have a better sleep and let it sit overnight. In the morning, slowly remove the fabric from your hair and wait a few minutes before finger-combing to separate and define the curls.
11. Banding Method
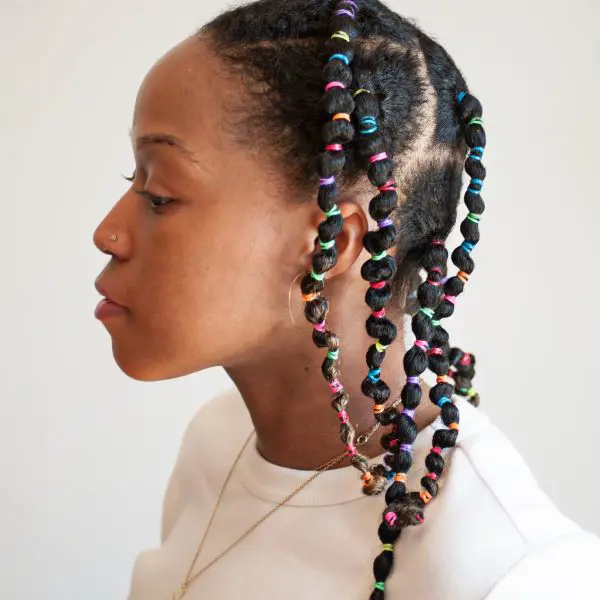
Gather several elastic hair ties or fabric bangs and a water spray bottle along with a wide-tooth comb. After gathering, start with freshly washed, damp hair.
Take one section of hair and begin at the roots by wrapping an elastic band around the base of the section to secure it. Then, repeat the same in all sections.
The drying time may vary depending on your hair's thickness, so allow it to air-dry fully. Once dry, gently slide the bands down and use your fingers or a wide-tooth comb to separate and fluff the waves.
12. Robe Belt Curls
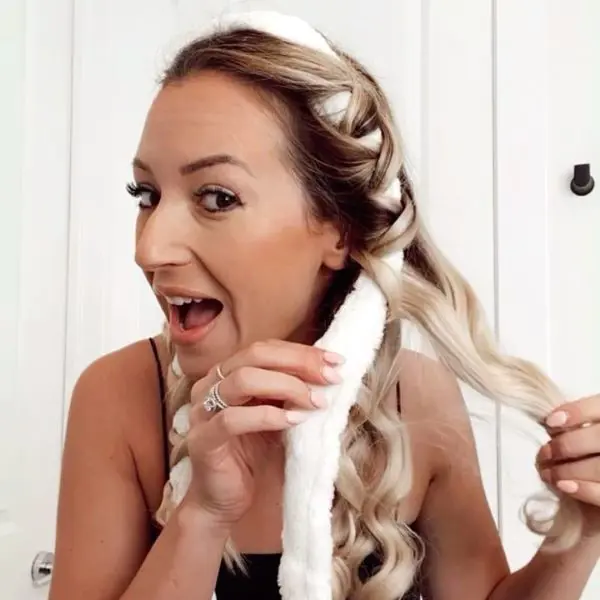
Are you one of those who want bouncy curls with minimal effort? If so, don’t wait- try robe belt curls! Wondering how to do heatless curls with robe belt? Here’s how!
Start with damp hair and part it into sections. Then, take your robe belt and place it over your head, like a headband. Next, wrap the sectioned hair around the belt from the ends to the roots.
Tie the belt securely to keep the hair in place, and let it dry for 6-8 hours. If you plan to leave it overnight, wrap your hair with a cloth to prevent the belt from shifting.
Like every other method, let it dry and then take off the robe. After that, separate the curls using fingers or a comb.
Summary
Heatless styling is an effective way to achieve beautiful curls without damaging your hair. The key to these methods is ensuring your hair is damp and detangled before starting.
But you might be wondering, which technique suits your hair type best? Here’s some insight:
Straight To Wavy Hair: Opt for robe belt curls or legging curls to create defined waves or soft curls.
Curly or Coily Hair: The banding method works well to stretch and define your natural curls.
For thicker or frizz-prone hair, additional support like leave-in conditioners or curl creams may be necessary to set the curls effectively. Understanding your hair type and condition will help you choose the best technique for optimal results.


